Zip Upload
- Earlier in AIV if user upload a new Dashboard in AIV. They asked to upload dependency file related to that Dashboard. By using this document user will learn how to upload Zip File into AIV which contains all dependency files related to that Dashboard in it.
What is Zip File?
- Zip Files use compression to send more data at faster speeds than has ever been possible. In Zip Files, the contents are compressed, which reduces the amount of data used by your computer.
Use Case
- Consider a scenario where user wants to upload a zip file which contains dashboard & files used in one particular dashboard at once in AIV. In this example; User will Drag files into Dashboard Section or click to browse Upload Files to Add from System.
Objectives
- Upload Zip File into AIV.
Prerequisites
- For this example we use dashboards.zip file
File type zip must be added in file type section to enable zip file upload. Click here to know how to create file type in AIV
Download dashboards.zip file from link given dashboards.zip for this example.
This Zip should contains following folders;
1. dashboards : All dashboard files (.dash) shlould be placed inside this folder
2. datasets : All dashboard files (.ds) shlould be placed inside this folder
3. datasources : datasources properties shlould be mentioned inside this datasources.json file. The sould not be any folder inside datasources folder. Also user should not create more than 1 json file. for mutiple datasource, add all datasource properties in single json only.
4. images : All images files shlould be placed inside this folder. This Images files will be uploaded in image folder in repository. user can check image added using image and text widget or from background image option available in dashboard setting option.
5. reports : All reports files (.rptdocument, .jasper, .penthaho) shlould be placed inside this folder
6. resources : All resources files (.csv, .json, .excel) shlould be placed inside this folder
- User can not add .exe or .jar or .zip file inside this zip folder
- User can add multiple folders inside main folders, if mentioned folders not created in AIV, it will create those folders and add files in it.
Skill Level Required
- No Prior knowledge is required.
Folder structure & their Name should be same as shown in downloaded zip.
Steps to add File Type
I. Login to AIV application by your credentials.
II. Go to Hamburger menu ![]() > Administration Section > File Types.
> Administration Section > File Types.
III. Now follow this Link to know how to create File Type in AIV.
IV. Create FileType Zip by following above given link.
Steps to upload Zip File into AIV
Login to AIV application by your credentials & you will be landed on your selected landing page.
If your landing page is not Dashboard, then go to Hamburger menu
 > Dashboard List View.
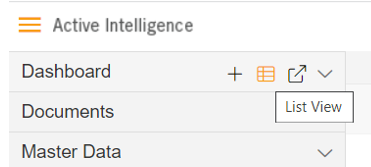
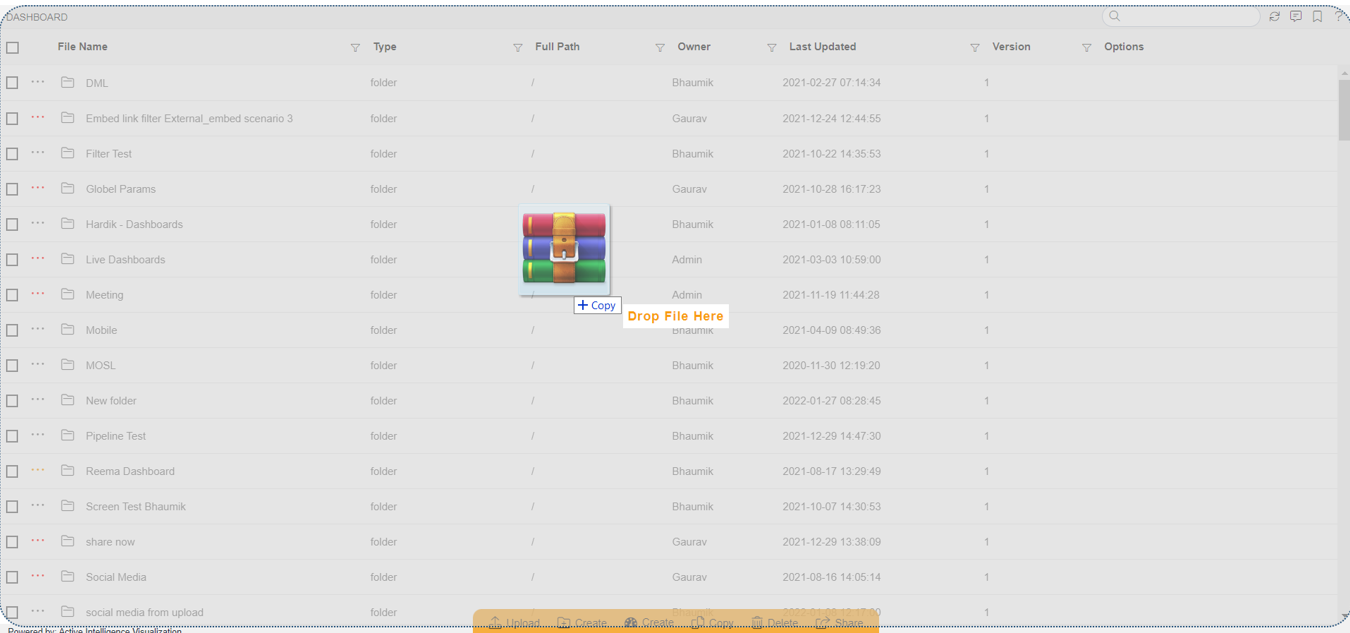
Drag your zip file & drop it into List-View of Dashboard.
For this example; use zip file you have downloaded at the start of this document.
Only user with Admin privileges can upload zip files.
When user drop this file, they will be able to see the below window:
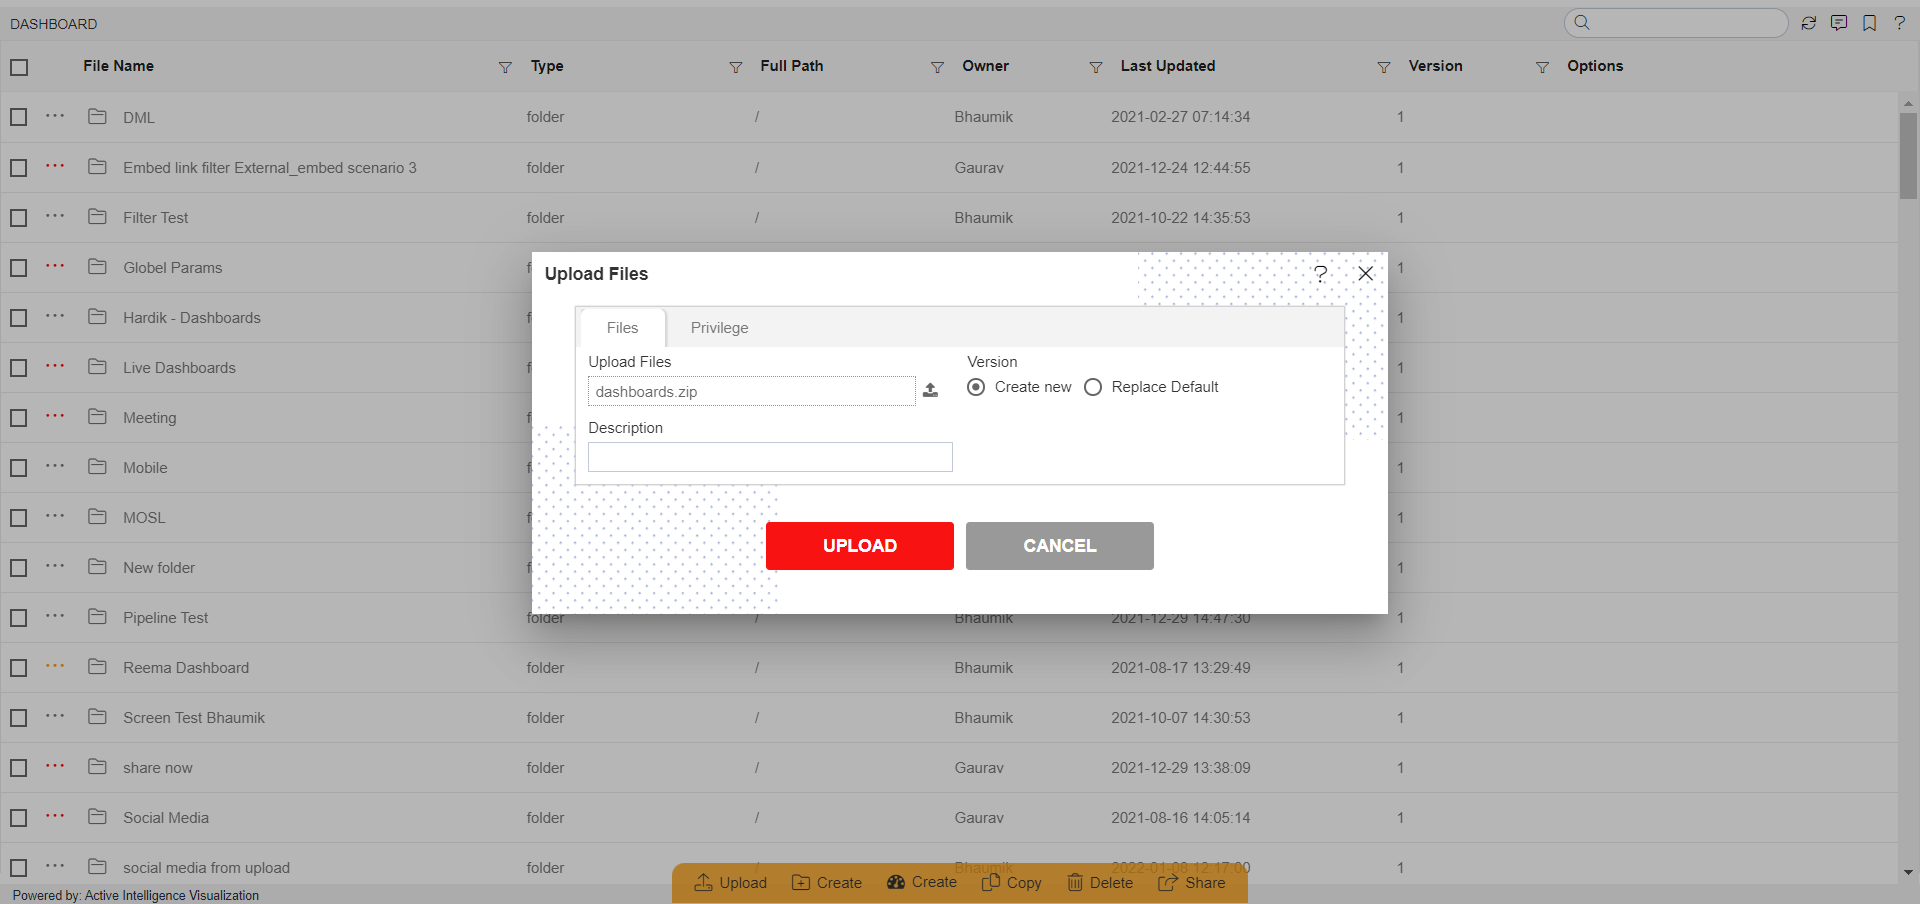
Click here to know more about Upload Files window.
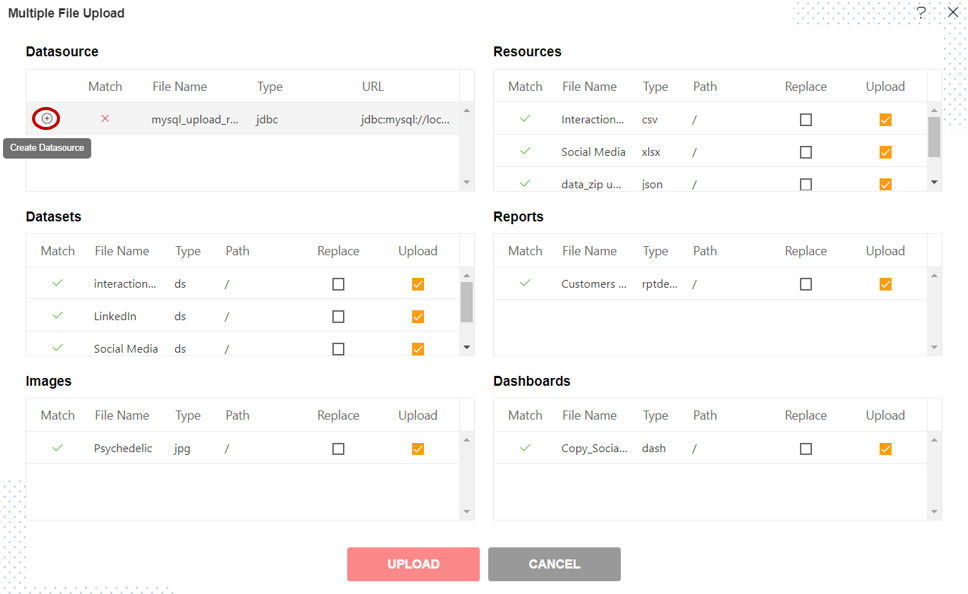
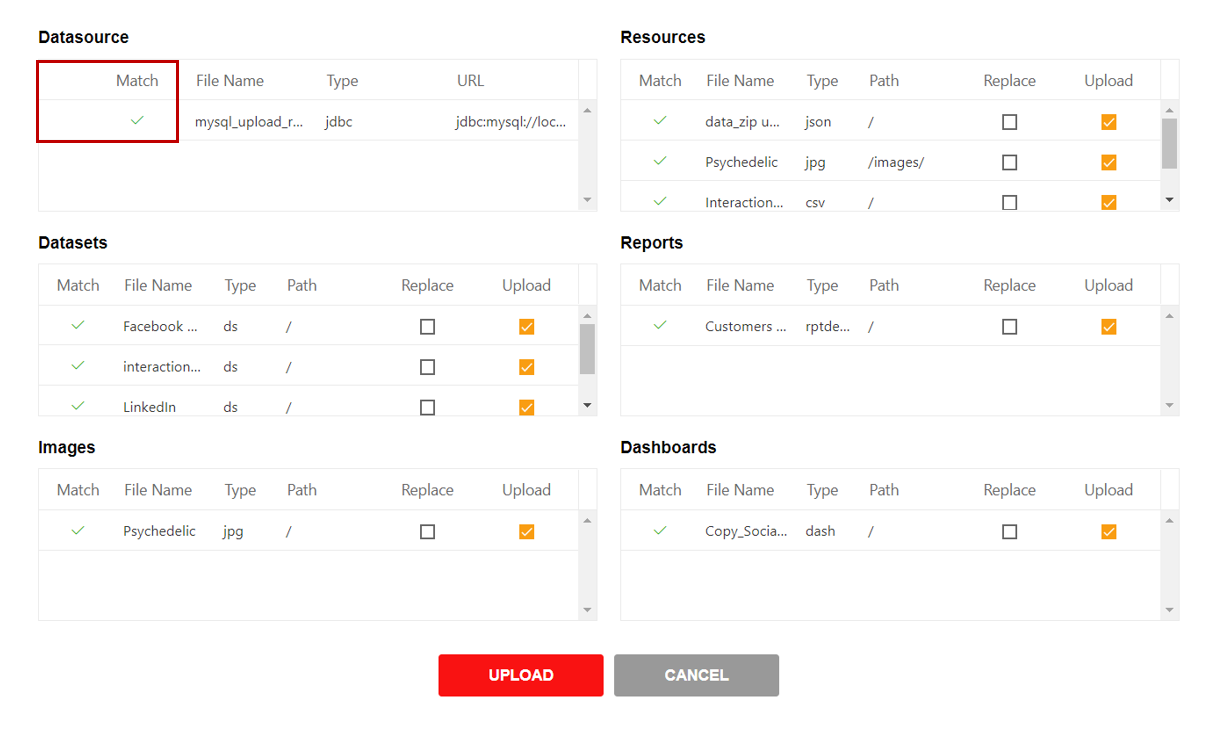
Click on Upload button & user will Mutiple File Upload window as per image below:
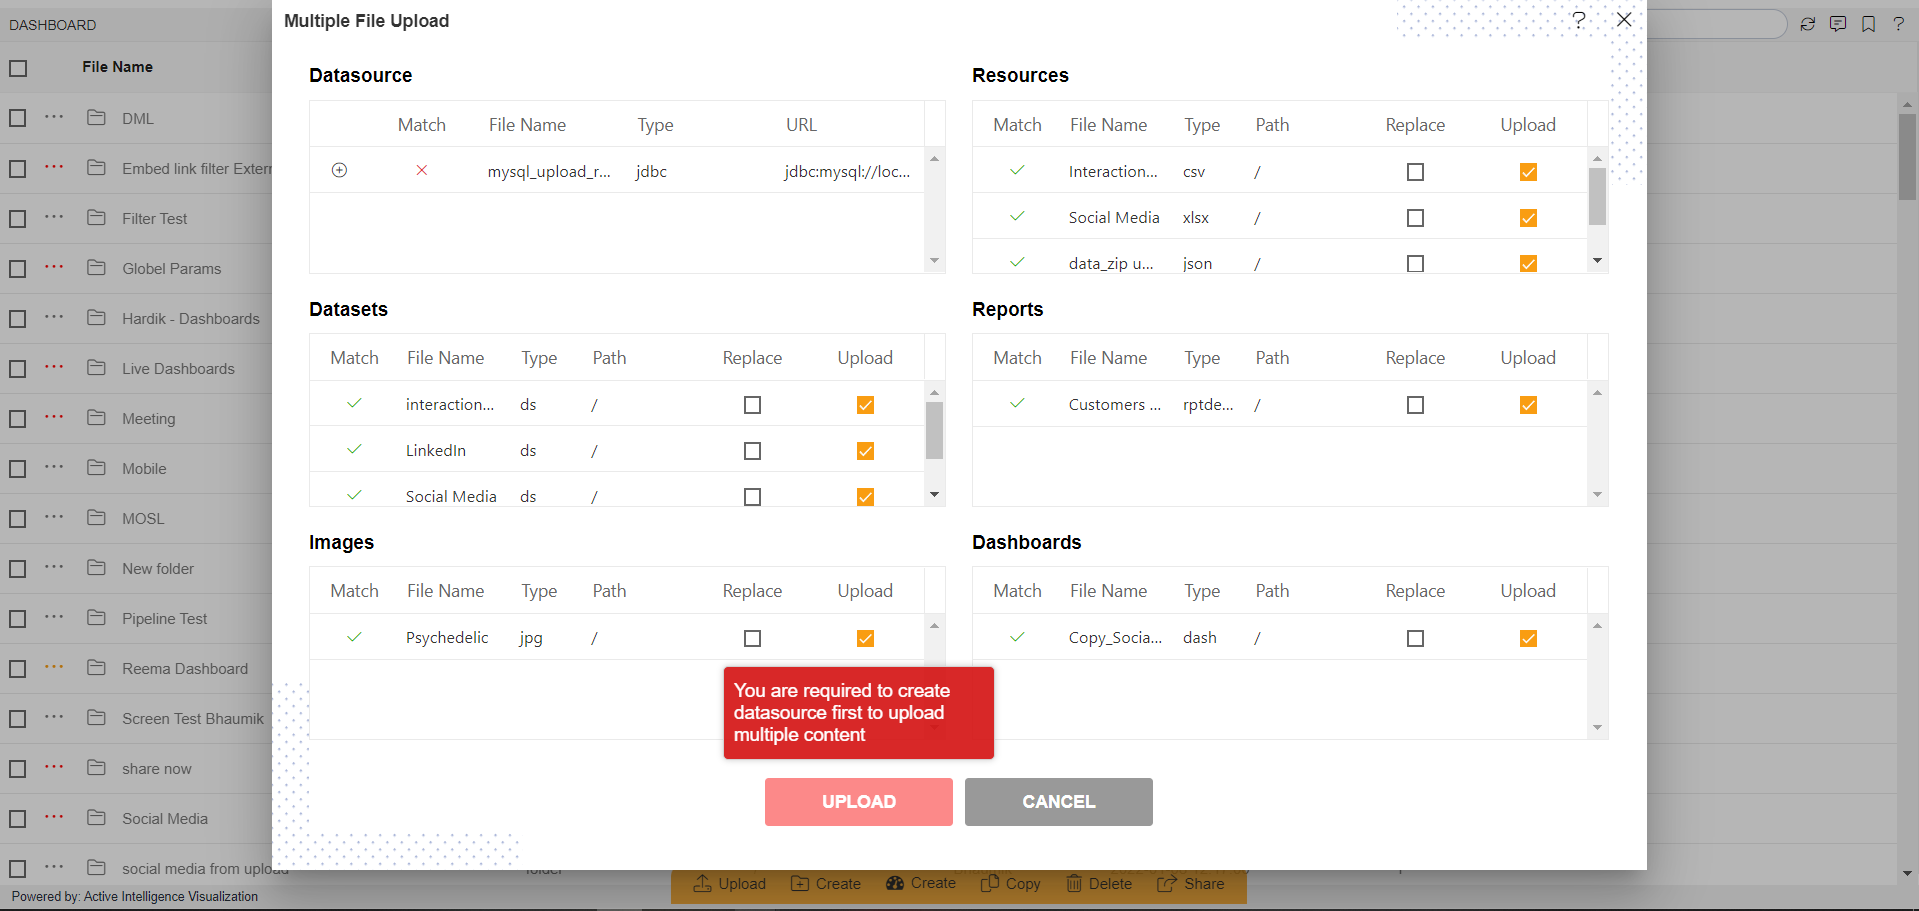
As shown in the image there are 6 Folder names are shown. Datasource, Resources, Datasets, Reports, Images & Dashboards.
As you will see there are 6 Columns for folder name Resources, Datasets, Reports, Images & Dashbords:-
1. Match:-
- It will show right icon if the same name of file are available in that particuler section.
2. File Name:-
- It will show respective File name of available files in that folder.
3. Type:-
- It will show the file type of that particular file.
4. Path:-
- It will display the path, where that particular file is saved.
5. Replace:-
- By checking this checkbox, user will decise that if they want to replace this file with existing same file or not.
6. Upload:-
- If this checkbox is checked, then after uploading files it will create a new version of that particular file.
- In Datasource folder screen, it will show four columns as below:-
I. Match:-
- It will show right icon if the same name of file are available in that particuler section or wrong icon if that file is not created in that section.
II. File Name:-
- It will display the name of that datasource file.
III. Type:-
- It will show you the file type of that datasource file.
IV. URL:-
- It will display the connection URL of that datasource file.
- There should be only one datasource json file. if you have multiple datasource to be added, keep all in one json file & Datasource json file name should not be changed.
As for this example; user need to create datasource first before uploading it, the message with red background will apeear at the bottom side as shown in the last image.
By clicking on (+) icon from the datasource window user can create datasource as required.
After clicking on (+) icon user window will look as below:
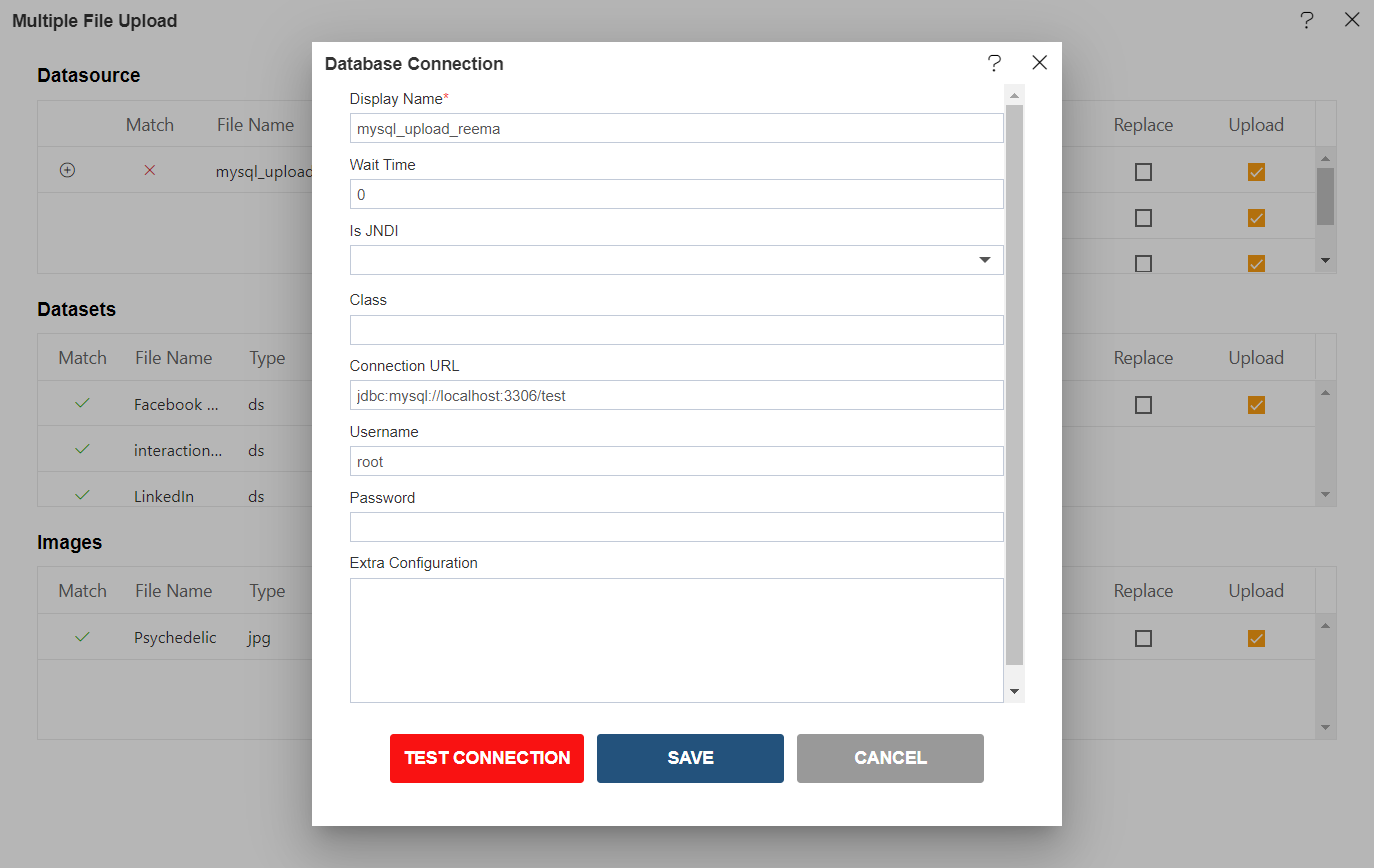
It will show the details filled same as available in .json file.
- For all kind of datasources, json format is different. Check asset > datasource.json file for this
- Filled required details here, to create datasource from here.
- Display Name: MySQL_Source
- Wait Time: 0
- Is JNDI: False
- Class: com.mysql.jdbc.Driver
- Connection URL: jdbc:mysql://localhost:3306/aiv
- Username: root [Insert your username]
- Password: [Enter your respective MySQL password]
while creating datasource, Username and Password should be written by user.
Verify added info, as shown in the figure below:
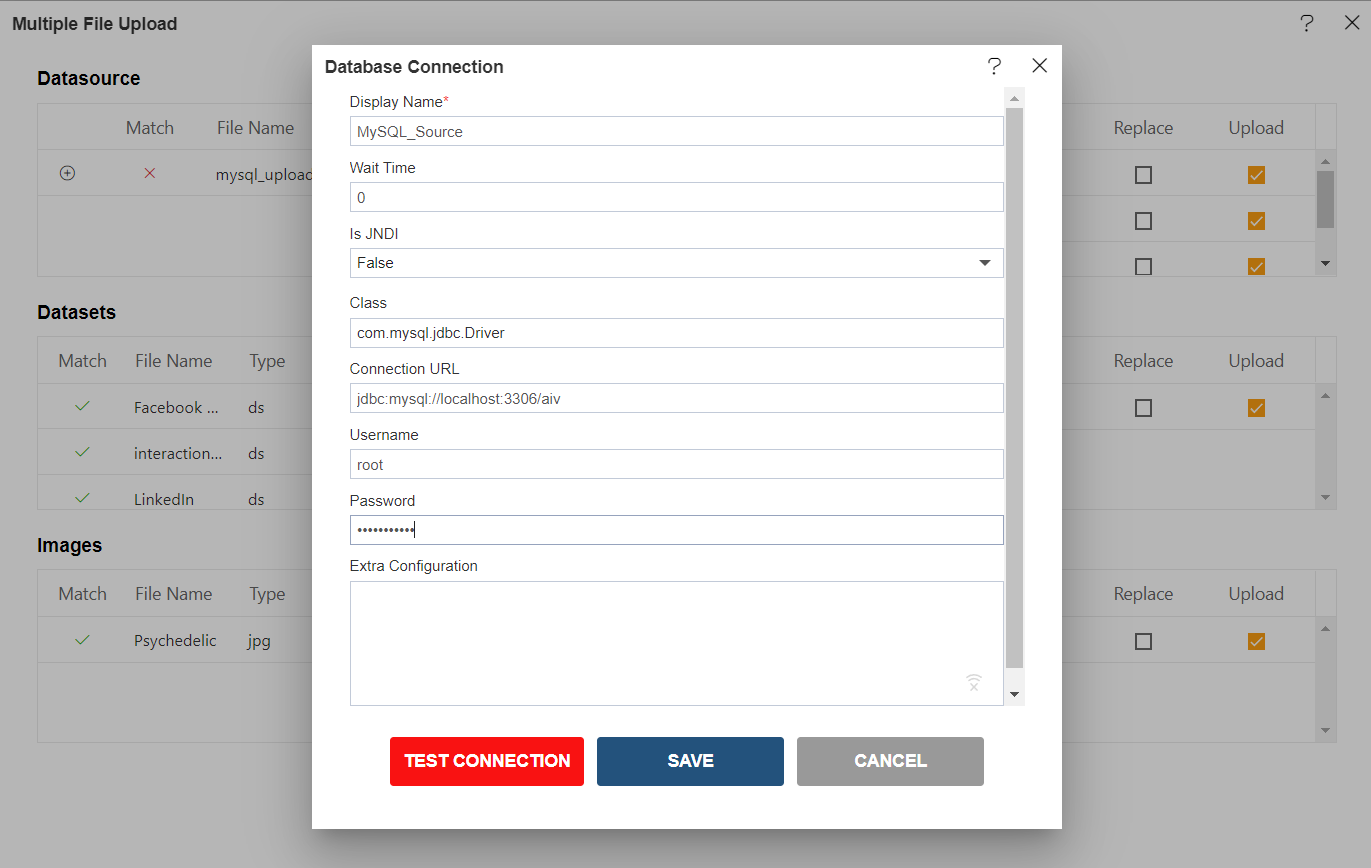
Click on TEST CONNECTION button & window will show a messae for Connection Successfully as shown below:
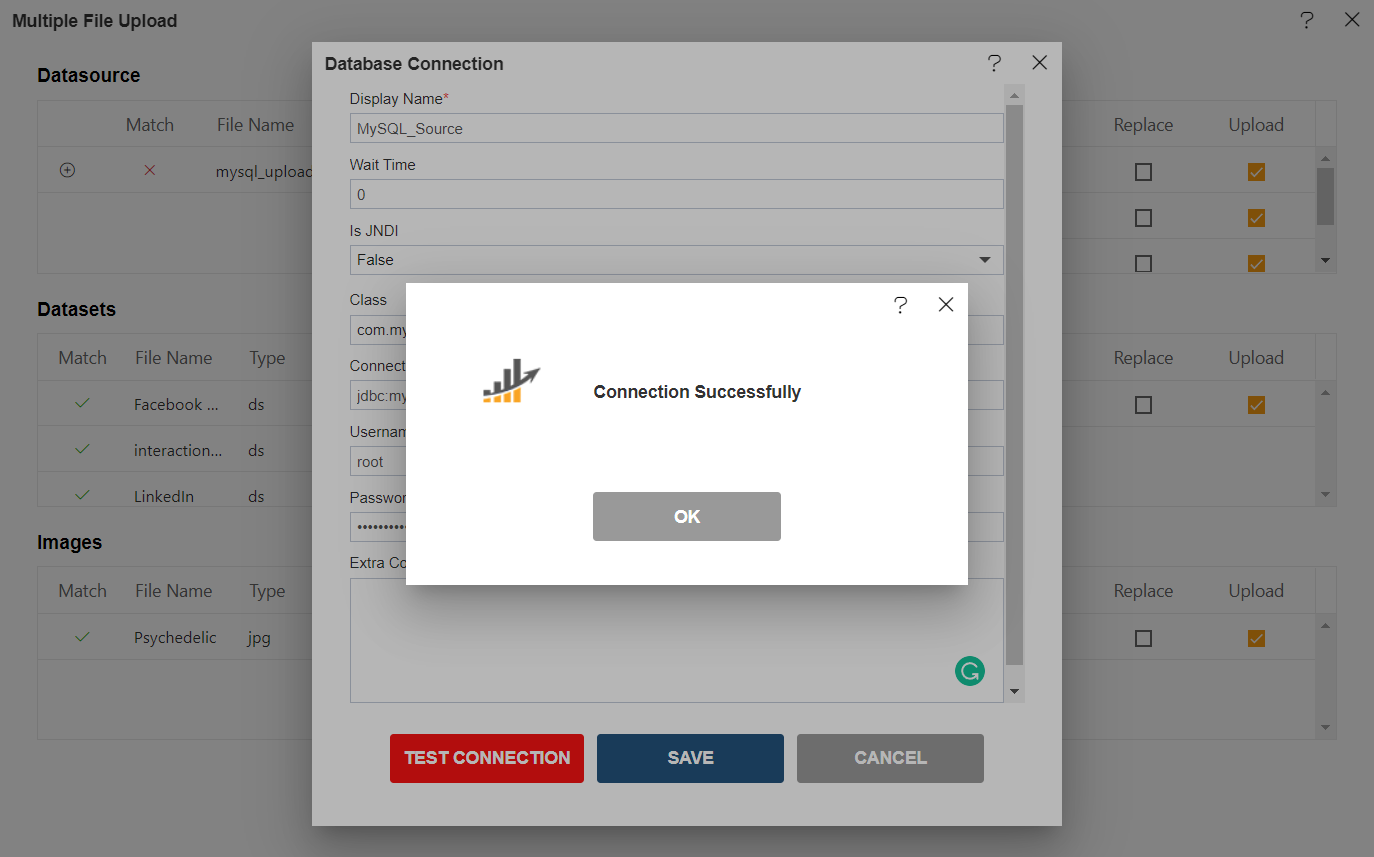
Click on OK & SAVE button respectively.
It will show a right as shown in imabe below, as datasource is created in that section.
Click on UPLOAD button & you zip file will be uploaded in AIV.
- User can upload same files multiple times.
- User should not add dashboard files in dataset folder or in any folder. Files to be placed in relevant folders only
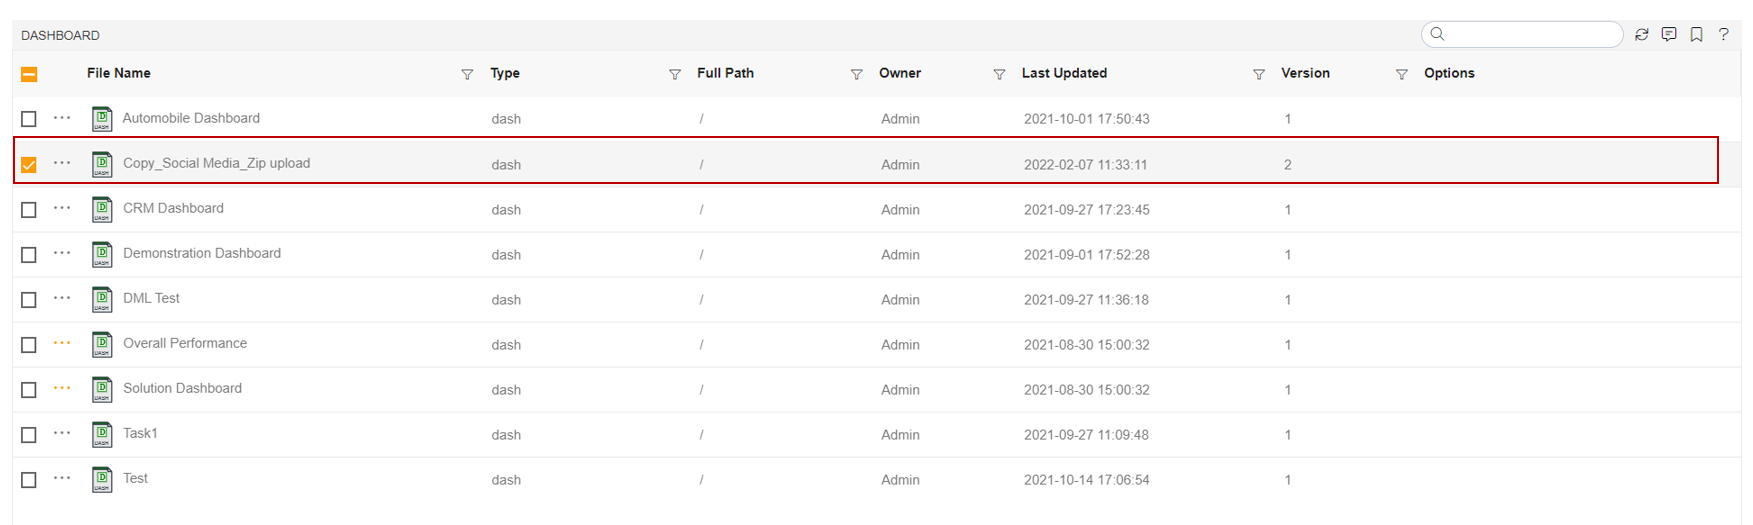
User can see that the zipp will be uploaded in Dashboard section. (Zip will be uploaded in other section also).
The dashboard named Copy_Social Media_Zip upload is available in Dashboard folder of Zip file.
User will see Copy_Social Media_Zip upload is available in List View of Dashboard Section.
Follow the same above steps to upload Zip file in other section.
Zip File can't be uploaded in Shared Resources, Request & Administration Section.
If user will try to upload Zip File in above given sections they will get a pop-up message showing Invalid files: [zip file name].